How to Make Rounded Corners (Shape Mask) in Final Cut Pro
Making rounded corners in FCPX is very simple to do but I couldn't find any simple tutorials, so I made one!
Intro
Ok, super quick post here. I’m working in Final Cut Pro (FCP/FCPX) and I want to be able to put a screenshot or another clip in my video and I don’t like the super sharp corners of the video that happens with the default overlay. I’d like them to be a little more soft and rounded. I did some Googling to try to figure out how to do this and the first couple of links weren’t terribly obvious with their solutions… but there is an easy solution (apply a shape mask) and I’m going to show you how to do it!
| Original | Rounded Corners |
|---|---|
 |  |
TL;DR
- Click and drag a Shape Mask from the Effects Browser to your desired clip
- ⌘5 to bring up the Effects Browser
- Modify the Shape Mask to your liking
- Click and drag on the Shape Mask in the viewer to move it around + adjust height and width
- In the Inspector, modify the Shape Mask’s feather value
- ⌘4 to bring up the Inspector
Applying a Shape Mask
In FCPX, on the bottom right, click on Show or hide the Effects Browser (or press ⌘5)
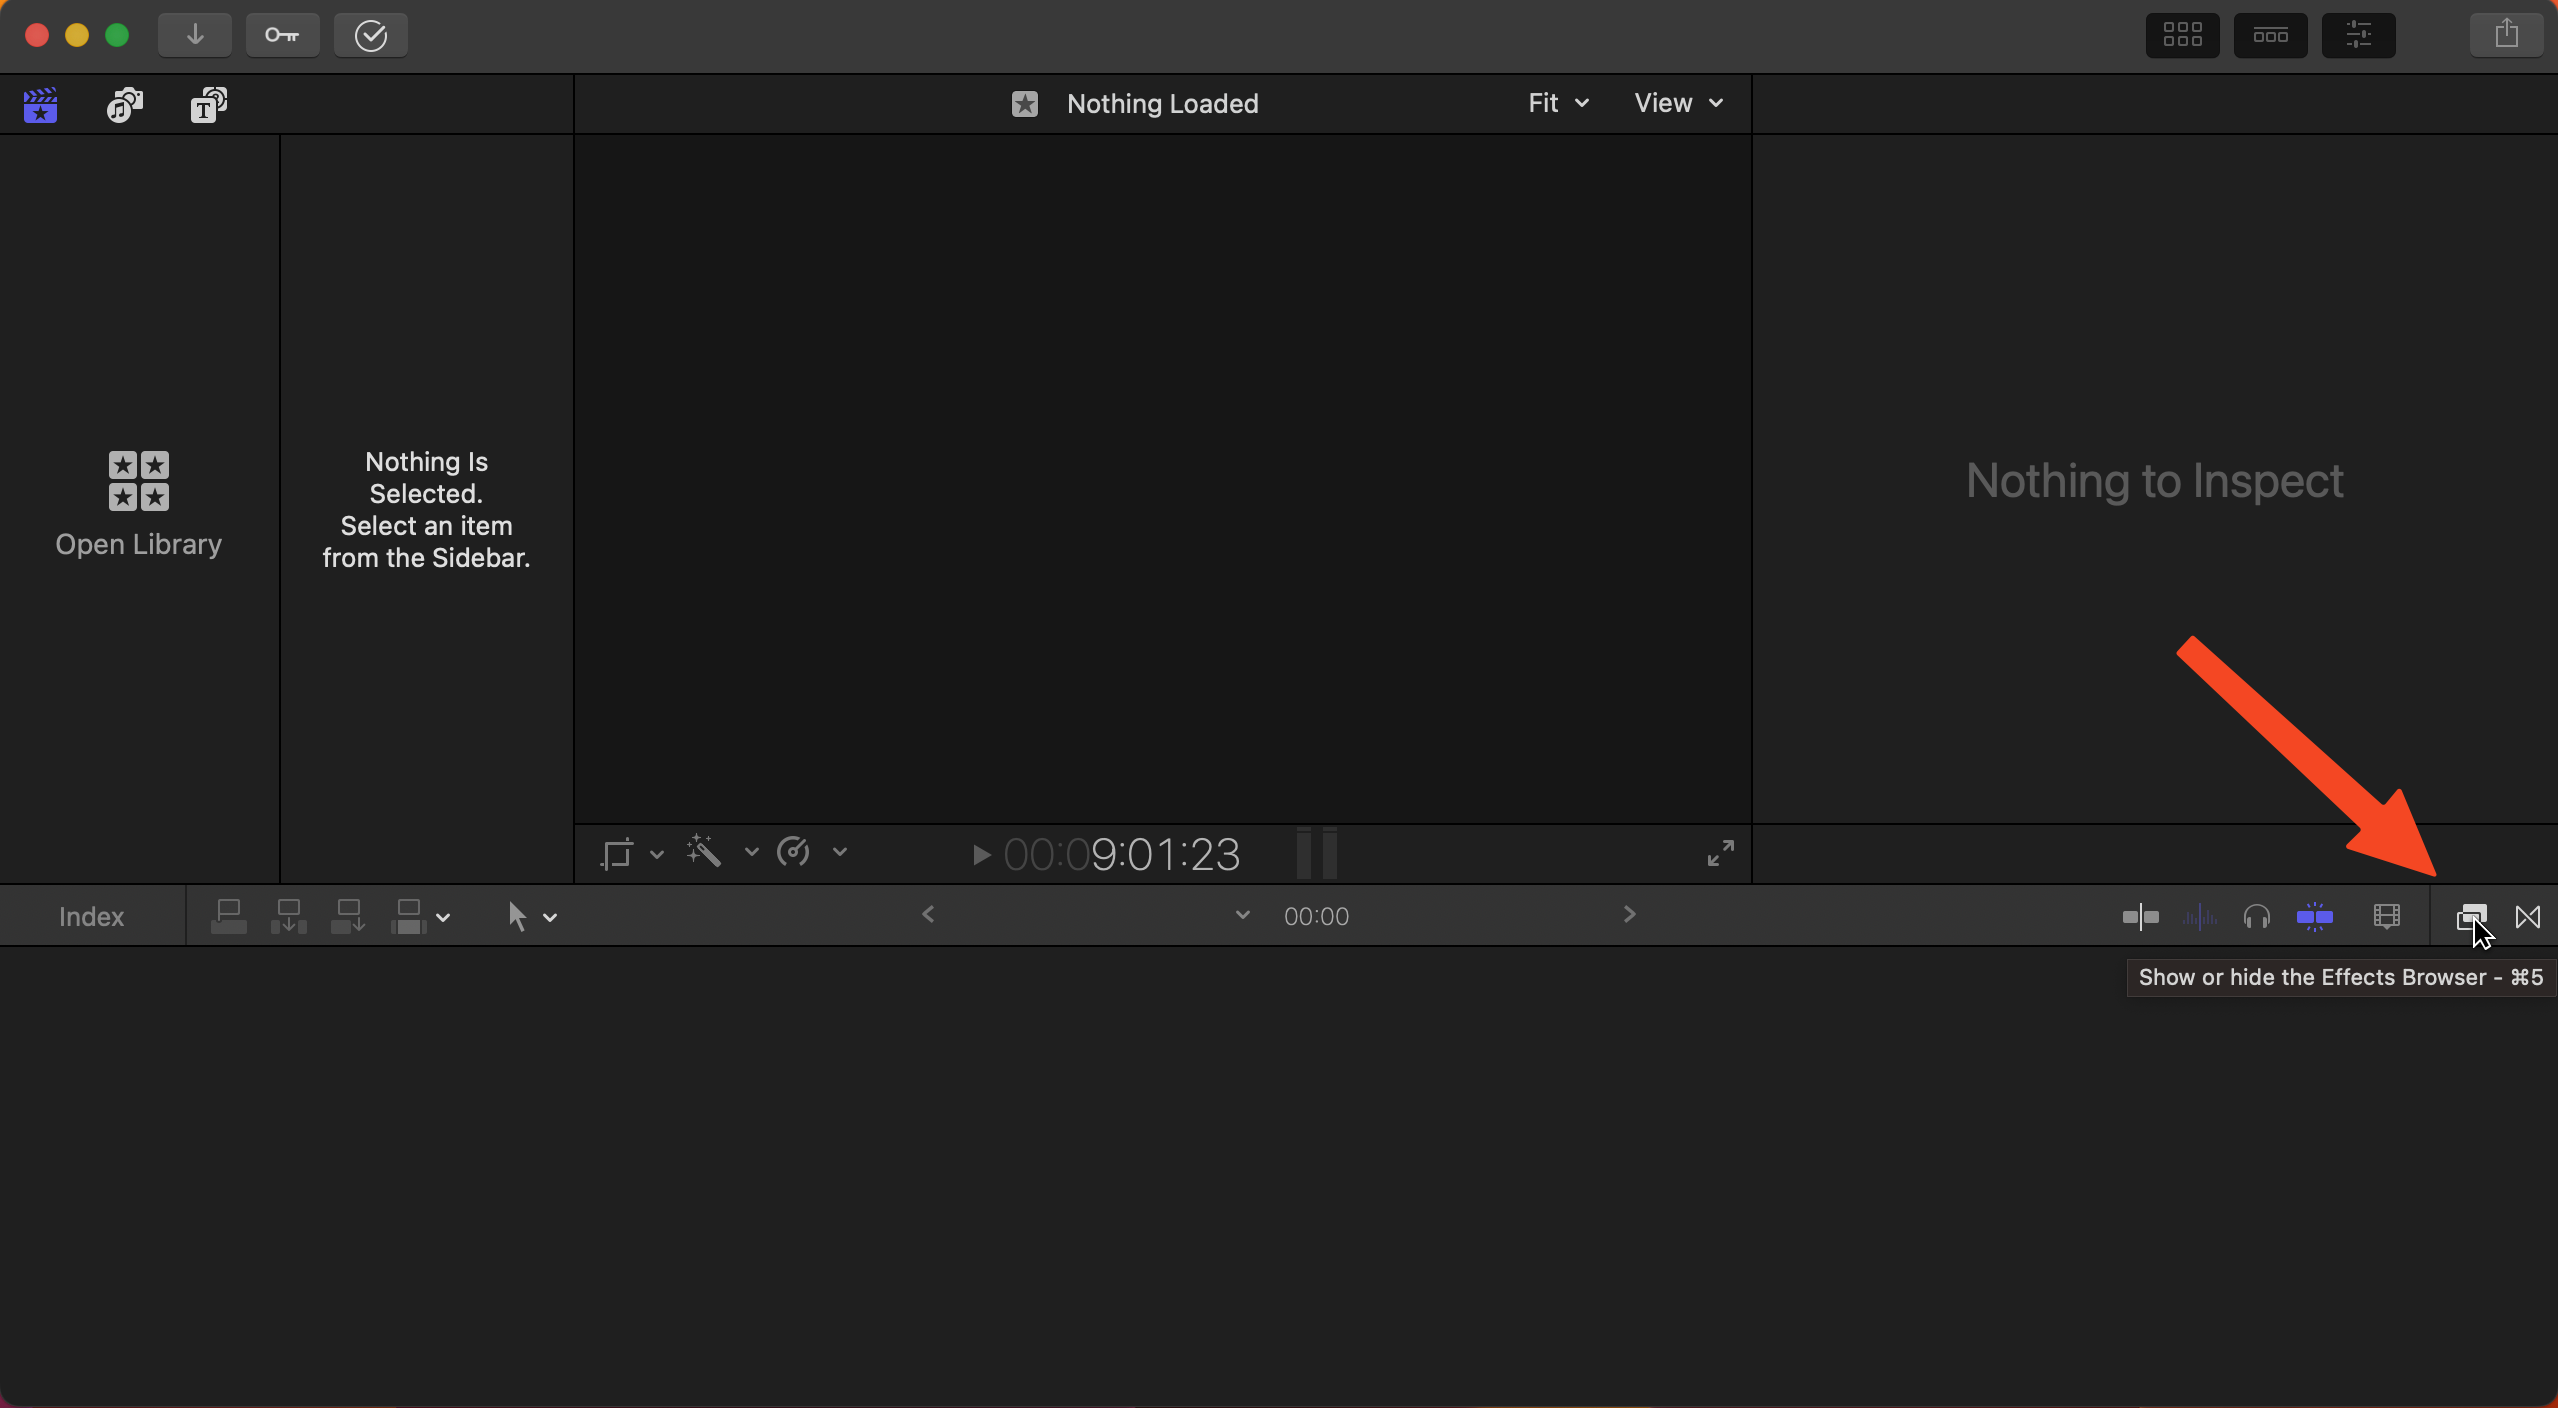 How to bring up the “Effects Browser”
Then, search for a “mask” Video Effect. This will bring up a draw mask, graduated mask, image mask, shape mask, and vignette mask. The draw mask is more for custom shapes that you want to be able to draw yourself. The shape mask is specifically meant for what we’re trying to do (those are the two that I’m familiar with). You’ll drag the shape mask onto our clip and you’ll see that it gets pretty close to what we were looking for.
Configuring the Shape Mask
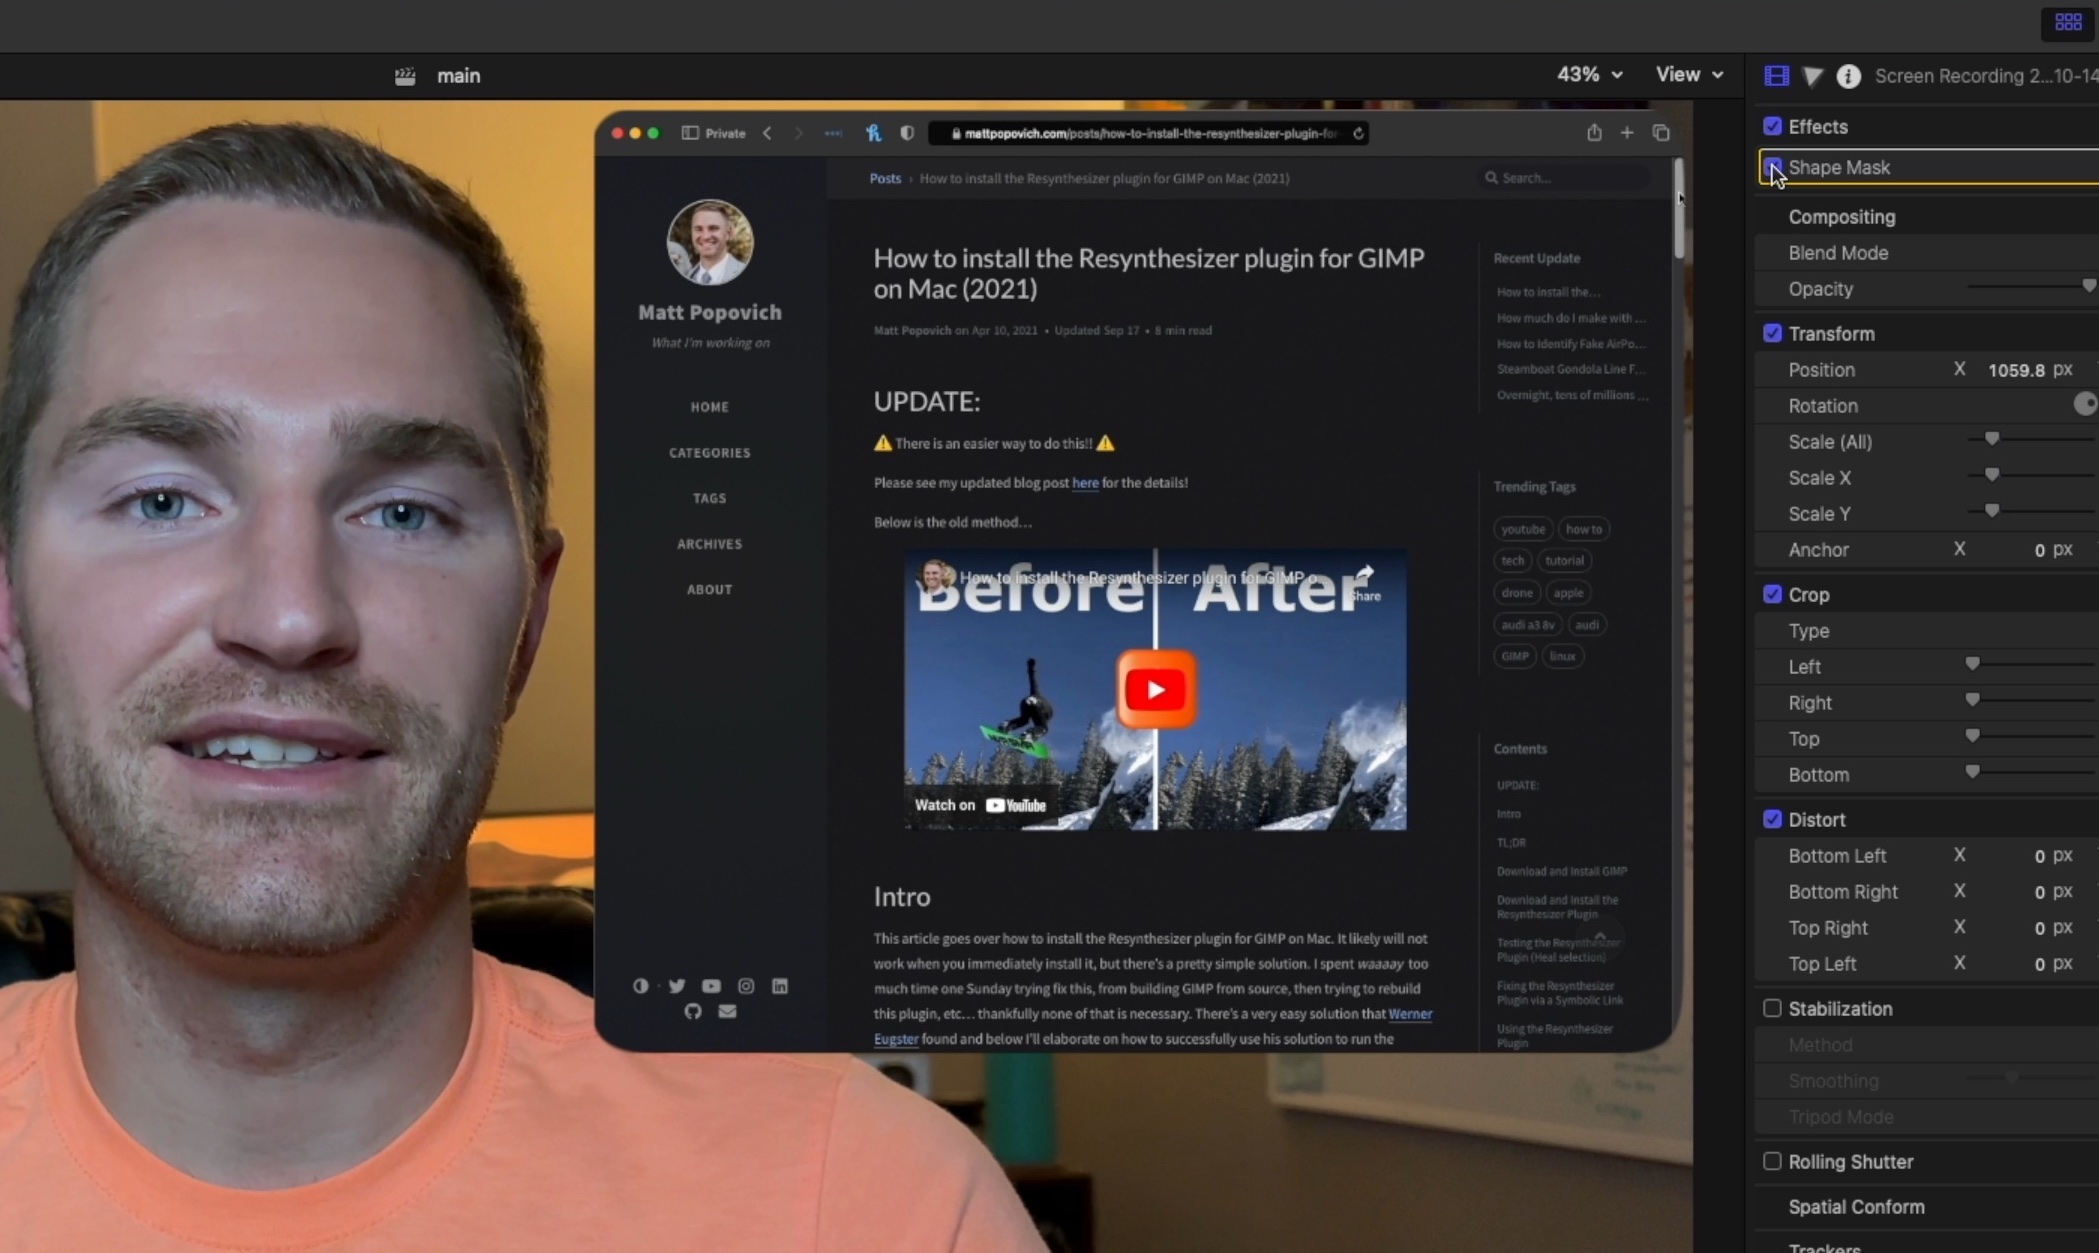
Now that we have the shape mask applied, there’s a few tweaks that I want to point out. For starters, you can click and drag on the shape mask in the viewer to move it around. You can drag the sides for the width and height of the mask. You can do the same thing in the “Inspector” (bring up the inspector window with ⌘4)
The big thing to point out in the Inspector is the “Feather” option for the Shape Mask. The Feather changes how hard or soft the edges of the shape mask fall off.
Potential Pitfalls
The only other thing I’ll comment on is you can somewhat “lose” the mask… If the “Shape Mask” isn’t selected in the Inspector, you won’t be able to click and drag and modify the shape mask in the viewer.
And this makes sense, for example, if you had many different clips and effects running around in the viewer, it could be hard to select the one effect that you wanted. This explicitly makes it clear which effect you are selecting and modifying.
However, even if you select the Shape Mask in the Inspector, there is a chance that you still won’t be able to click and drag the Shape Mask in the viewer to modify it. If you want to be able to modify the Shape Mask in the viewer, you need to make sure “Show Shape Mask onscreen controls” is selected in the Shape Mask section in the Inspector.
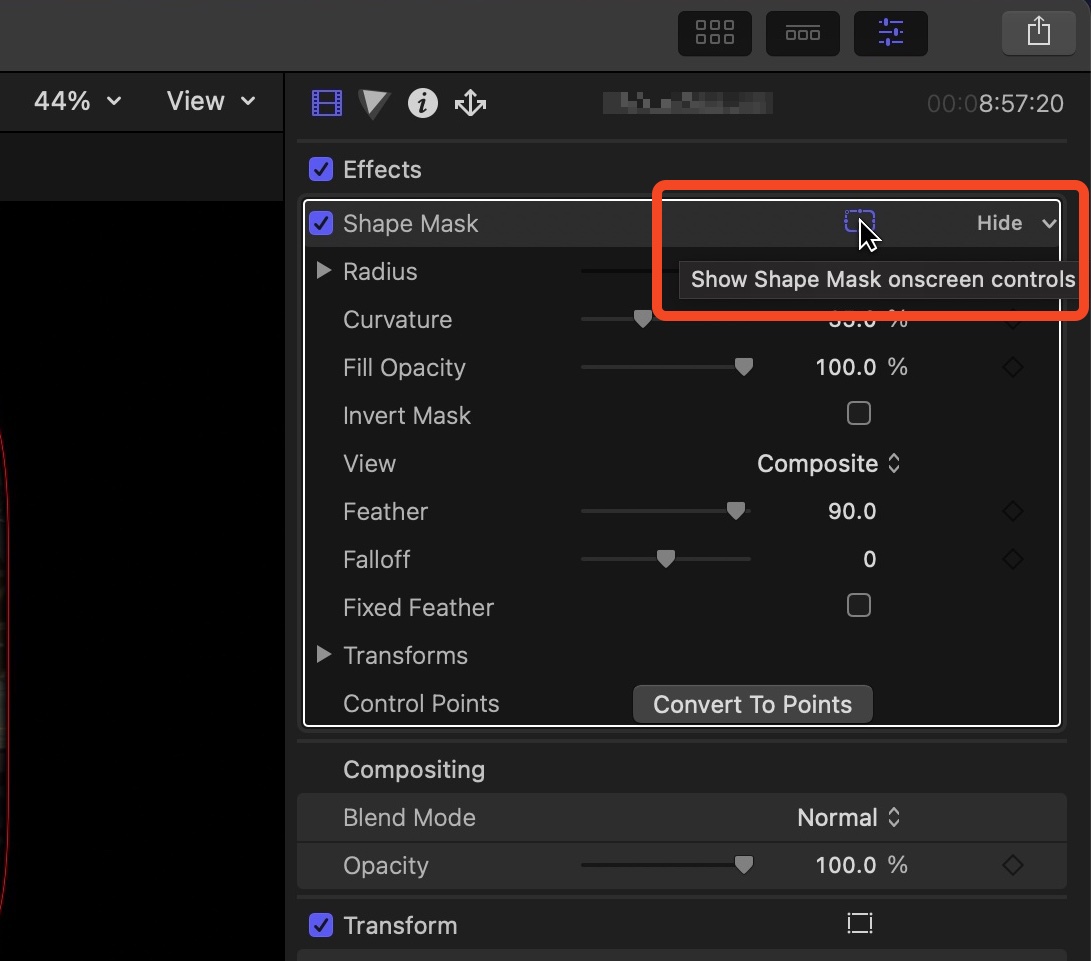 How to “Show Shape Mask onscreen controls”
Outro
That’s about all there is to the Shape Mask. Feel free to customize and mess around with it. I will leave the other parameters of the Shape Mask Inspector as an exercise for the reader 😉
Hope this helps!